

A keyboard, switches, a stabilizer, and keycaps were just purchased. It is time to build a mechanical keyboard.
Even so, several keyboard manufacturers offer unique building instructions. Nevertheless, in most cases, they are listed in the order:
- Test PCB
- Lubricate, tune, and install your stabilizers
- Mount switches to the plate and PCB
- (Optional) Solder switches – skip if you have a hot-swap PCB
- Test PCB with switches
- Mount the PCB and plate into the case
- Top off with keycaps
- (Optional) Remap your keys
Step 1: Test the PCB
Examine the PCB first, please. Make sure everything is functioning correctly before investing the effort in building it all up. Thereby saving you the hassle of subsequently disassembling it.
A circuit board is used to do, which is connected to your computer. Please attach your keyboard to the PCB using JST connectors and to your computer through USB if it is an add-on keyboard.
The next step is to launch switch testing software, such as VIA, and use metal tweezers to contact each switch’s socket to ensure it is operational. Building connections from the rear of the PCB, which has greater access to the conductive parts, is one tip that simplifies the process.
You can ask for a replacement if something is broken by contacting the manufacturer.
Step 2: Attach The Stabilizer After Lubricating And Adjusting It.
The stabilizer bar will next need to be put together and lubricated. This is crucial for stability and support for lengthy keys like the space bar. Unfortunately, your stabilizers, or “tips” as often known, are mainly out of tune and unlubricated.
To ensure quiet operation and operation without vibration, the stabilization system will be adjusted to the desired level.
Tips For Getting Stabilizers
While you shop for a stabilizer, keep the following in mind:
- Mounting of PCBs and boards in general Custom keyboards commonly employ stabilizers installed on PCBs.
- Fasteners that click on and screw on are both functional. Yet, some contend that stabilizer bolts offer greater safety and are less prone to vibration. For a rigid dimension, use screws and washers.
- PCB thickness; several manufacturers produce thinner PCBs; nonetheless, most are 1.6mm thick. The manufacturer will generally take care of this if you choose a thinner PCB; however, in that case, you might also need to purchase a 1.2mm stabilizer.
Step 3: Mount Switches To The Plate And PCB
Next, take your plate. The space bar, Enter, and space bar are the most commonly used on a keyboard. While securing the PCB to the board, there may occasionally be overlap. Before continuing, complete this.
Start at a corner when placing the switch, then work your way to the middle to help align and secure the board and PCB together. Using PCBs or flexible board material without requiring screws is possible with this command.
Verify that the key is correctly positioned on the board. Please remove the bent switch pins and insert them into the hot-swappable sockets on the board. Straighten the switch contacts if they are bent using pliers or other pliers. and need to be installed minishortner correctly.
Instructions for Installing the Switch
- Check to ensure the pin is correctly put in the socket before attaching any switches. Straighten it with tweezers if it is bent.
- Be careful to hold the PCB’s back while pressing the switch firmly and uniformly. Therefore, he placed it on a platter.
- To check if the pads and PCB are parallel, you can easily pull up the edges if your sheets begin to tear.
- several buttons on the circuit board may be set to face either north or south. More combinations are shown below. Other boards, such as 6.25u short field or 7u long field.
Step 4 (Optional): Soldering Switches
You would need to do the extra step of soldering your switch unless you purchased a hot-swappable PCB. To install keyboard switches, soldering is the usual method. This will enable electrical contact by soldering and connecting the pins to the board.
The separate soldering needed for soldering is semi-permanent. Change the key if you choose.
Step 5: Test The PCB With The Switches
The moment has come to run key testing software on each key. It would be best if you pushed the key this time. We may need to remove one switch if it isn’t functioning.
Frequently, incorrect pin insertion is the cause of the issue. Also, if the pins bend while inserted, you should straighten them.
Step 6: Mount The PCB And Plate Into The Keyboard Case
The PCB and plates can now be installed in your case after everything is operational. Every mechanical keyboard has unique configuration features, as we have already discussed. Please refer to the offered information as a result.
To prevent scuffing or sliding of the keyboard, they frequently incorporate protective rubber or silicone feet on the base. continual uploading
Now that your daughter board has been mounted in the casing and connected to your JST wire, if your PCB utilizes one, you may proceed to mount it. Again, the pins within the JST enclosure should line up with the holes.
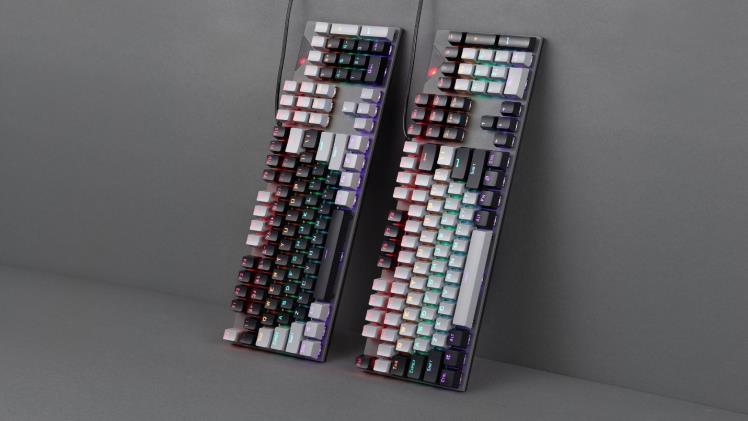
Step 7: Top Off With Keycaps
Our keycaps are added as the last phase of assembly. The method should be simple based on the appearance of your keyboard. It would help if you affixed your keycaps to the housing at the top of the key.
As we already know, various keycaps have varied angles throughout each row to make typing more comfortable. In addition, you may notice that some keys are duplicated at varying heights and angles since these keypad sets are made to match a range of keyboard layouts.
By examining the profile, you always control how your keyboard is added to the clipboard. For example, with a push button cover puller, you may remove and replace the button cover if you inadvertently installed it at the incorrect height.
Step 8 (Optional): Remap Your Keys
If you wish to adjust the keymap layout, you can skip to the last step. A keyboard may be plugged in, VIA (or any suitable remapping program) installed, and the keys can then be remapped to your preferences. Even programming your layers is possible using the Tiny keyboard. Also, you need to make a macro if you wish to use shortcuts.
Congratulations, you have successfully designed your first keyboard.